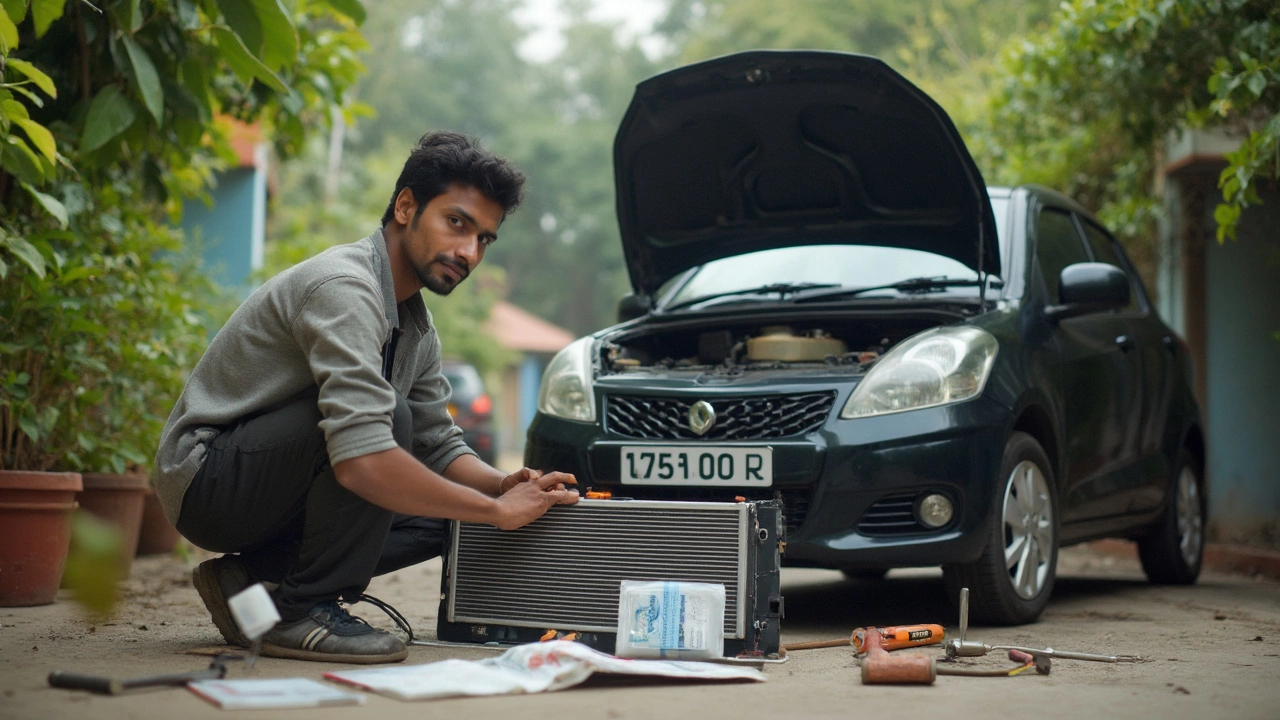
Replacing a car radiator by yourself sounds intimidating, right? If you’ve padded around an auto parts store, you’ve already guessed that labor costs often match—or beat—the price of the radiator itself. That’s enough motivation for a lot of folks to wonder if they could just do it at home. Here’s a fact: as long as you’re a little handy, swapping a radiator isn’t rocket science.
The basics go like this—you disconnect hoses, remove the old radiator, swap over any sensors or fans, drop in the new one, connect everything, refill with coolant, and bleed out air. No welding. No coding. No secret handshake with the car gods. But there’s plenty that can slow you down, from stubborn clamps to weirdly placed bolts—especially if rust or old age have claimed your engine bay.
Before you rip into things, get honest about your comfort level. Can you spot leaks? Do you know the signs your car has overheated? This job is more than just wrench-turning: mess up, and you could wind up stuck on the side of the road, engine steaming, wallet suddenly much lighter—ask me how I know.
- Can Anyone Replace a Car Radiator?
- Tools and Parts: What You Truly Need
- Big Mistakes and How to Dodge Them
- When DIY Isn’t the Best Call
Can Anyone Replace a Car Radiator?
Honestly, if you can follow instructions and handle basic tools, you’ve got a real shot at swapping a radiator yourself. You don’t need a degree in engineering—just some patience, a good spot to work, and a willingness to get your hands messy. Most car radiators are held in by simple brackets or bolts, with hoses and maybe a couple of sensors plugged in. No high-tech wizardry involved.
Here’s what you actually need to tackle a radiator replacement safely:
- Some basic hand tools (wrenches, screwdrivers, pliers)
- New coolant to refill the system
- A safe way to collect old coolant (because it’s toxic and can’t go down the drain)
- Gloves and safety glasses (for obvious reasons)
The main snag for a total beginner is getting stuck on seized bolts or snapped hose clamps. But that’s not unique to car radiators—it’s the same for any older car or truck part. If you’re worried, pop open YouTube and search your exact year, make, and model. Someone’s probably done a full walkthrough video already, showing every crusty bolt up close.
If you’re curious how much money this could save, check out these rough numbers:
| Repair Type | Average Shop Cost (USD) | DIY Cost (USD) |
|---|---|---|
| Car radiator replace | $500–$900 | $120–$300 |
| Related coolant flush | $100–$150 | $15–$30 |
No, it’s not the world’s easiest maintenance. But with some clear space, a couple of hours, and a willingness to learn, a regular person can tackle a car radiator and keep a few hundred bucks in their pocket. Just don’t rush it—take your time, double-check everything, and don’t be afraid to ask a friend for help if you need an extra hand.
Tools and Parts: What You Truly Need
Ready to tackle a car radiator swap? Here’s what you’ll really need—no fluff, just the essentials. Most folks already have half this stuff in their garage; the rest isn’t hard to pick up. If you skimp on tools or grab the wrong parts, you’ll hate yourself halfway through. Trust me on this one.
- Socket set and wrenches: Most radiators are held in with bolts sized between 8mm and 14mm. A socket wrench helps big time with tight spots.
- Pliers: You’ll use these for hose clamps—which sometimes fight back more than the bolts.
- Drain pan: Radiators hold anywhere from one and a half to three gallons of coolant. Without a big catch pan, you’ll have a river in your driveway.
- New radiator: Make sure you get the right one for your year, make, and model. Check if you need fittings for an automatic transmission as well.
- Coolant/antifreeze: Pick the recommended type for your car. Using the wrong color can actually cause gunky deposits inside your new radiator.
- New hoses (optional): If your old ones are cracked or feel mushy, swap them now. Hoses usually cost under $30 apiece.
- Hose clamps (optional): Old clamps get weak. A box of new ones costs less than lunch and can save you from leaks.
- Flathead screwdriver: Handy for prying and those pesky old-style screw clamps.
- Funnel and shop towels: Unless you enjoy coolant puddles and slippery tools.
Here’s a quick cheat sheet—a little snapshot of what you’ll throw in the shopping cart, with some rough price ranges:
| Item | Typical Price |
|---|---|
| Radiator | $120–$400 |
| Coolant (2–3 gallons) | $30–$50 |
| Upper/Lower Radiator Hoses | $20–$60 |
| Hose Clamps (each) | $2–$5 |
| Drain Pan | $10–$20 |
| Socket Set/Wrenches | $0–$80 (if you need them) |
Don’t get lured into fancy toolkits unless you need an excuse to treat yourself. The real headache comes from missing the small stuff—like fresh hose clamps or forgetting enough coolant. Quick tip: Check your owner's manual for the exact fluid type and everything you’ll need to remove (sometimes, it’s the fan shroud or even the front bumper—no joke). Plan ahead, and you’ll get through this without extra trips to the store.

Big Mistakes and How to Dodge Them
It’s wild how many people hit the same trouble spots when replacing a car radiator. Most problems aren’t shy—they leave stains, burnt arms, or a check engine light glaring right back at you. A lot of common mistakes show up on forums every week, so you’re not alone.
- Leaving Air Pockets: This one tops the list. If you don’t properly bleed your cooling system, hot air gets trapped. Air pockets lead to overheating fast. Use a proper bleed screw if you’ve got one or the heater on max to work bubbles out.
- Mixing Coolant Types: Mixing green and orange coolants isn’t just ugly—it can cause sludge. Always check your owner's manual or just match whats already in there.
- Clamping Hoses Wrong: Over-tighten and you can crack the plastic on the radiator. Go loose and you’ll get leaks. Hand-tight with maybe a quarter-turn more usually does it.
- Forgetting to Replace Old Hoses: New radiator, old rotten hoses? A recipe for leaks. Hoses go brittle over time. If you’re already under the hood, throw on fresh ones and skip a do-over later.
- Not Disconnecting the Battery: With electric fans, you do not want to lose a finger. Unplug the negative terminal and save yourself a nasty surprise.
Here’s a quick look at where people usually mess up:
| Mistake | What Can Happen |
|---|---|
| Forgot to bleed the system | Overheating, warped head gasket |
| Mixed coolant types | Coolant sludge, blocked passages |
| Reused crusty hoses | Premature leaks, return trips under the hood |
| Skipped reconnecting sensors | Fan won’t kick on, engine light comes on |
| Didn’t check for leaks | Puddles under your car, low coolant warning |
If you want to play it safe, double-check every clamp and look for dried coolant around your connections. Warm up the engine and keep your eye on the temp gauge. One last tip—hang onto that old radiator until you know you’ve conquered every drip, drool, and rattle. Swapping out a radiator is totally doable, as long as you sidestep these classic rookie moves.
When DIY Isn’t the Best Call
Sometimes it just makes sense to hand off that car radiator job to a pro. You might be pretty savvy with tools, but even the best DIY spirit can run into a wall—literally, if your radiator is buried behind layers of hoses, sensors, or even the front bumper.
Modern cars, especially after 2015, love to pack the engine bay tight. On many makes (think some European or luxury brands), replacing the radiator can mean draining the AC, removing reinforced cross-braces, or even disconnecting electrical sensors you can’t easily reset at home. If you notice your car’s radiator is integrated with other systems or your manual mentions "special removal tools," you already know this isn’t a Sunday afternoon project.
Here are times when it’s smart to skip DIY:
- Your radiator is really hard to access, requiring major disassembly.
- You see leaks but can’t track down exactly where they’re coming from.
- Your car is under warranty—messing with it might void coverage.
- You don’t have a place for all that coolant, or aren’t sure how to dispose of it safely.
- You spot electrical connectors and sensors you’re not confident unplugging.
There’s also time and cost to think about. The average pro radiator swap? It takes 2-4 hours and usually costs between $300 and $900, parts and labor included. Doing it yourself saves labor, yeah, but if something goes wrong—cross-threaded bolts, missed leaks, or trapped air—it might eat up a whole weekend and end in a tow bill anyway.
| Option | Time (hrs) | Average Cost (USD) | Risk of Mistake |
|---|---|---|---|
| DIY | 4-10 | 100-400 (parts only) | Moderate/High |
| Professional Shop | 2-4 | 300-900 (parts + labor) | Low |
The last thing you want is a coolant leak on your favorite sneakers, stripped threads, or an engine that overheats because a tiny step got missed. Also, if you bust a hose fitting on an old car, finding the right replacement can take days—and leave you stranded in the meantime.
The bottom line? Don’t let pride turn what should be a smart repair into a wallet-draining headache. If your car’s design is tricky, you don’t have the right space (or patience), or the risks are high, there’s zero shame in letting a shop handle your radiator swap.


