Brake Pad Thickness Checker
Check Your Brake Pad Thickness
Enter the thickness of your brake pads in millimeters (mm) to see if they need replacement.
Enter your brake pad thickness to check if they meet safety standards.
When you hear a squeal or feel a pulsation in the pedal, it’s easy to wonder if your brakes are on their last leg. Knowing the exact signs that your brakes need replacing can save you from unsafe trips and costly repairs. Below you’ll find clear symptoms, step‑by‑step DIY checks, and a quick cheat‑sheet for when to call a professional.
Key Takeaways
- Listen for high‑pitched squeal or low grinding - both point to worn brake pads.
- Feel for pedal sponginess, vibration, or pulling to one side.
- Visually inspect pad thickness, rotor condition, and brake fluid level.
- Replace pads at 3 mm or more wear; rotors usually need attention at 1 mm or when warped.
- Regular maintenance (cleaning dust, flushing fluid) extends brake life.
1. Common Signs Your Brakes Are Near the End
Every driver notices something odd before a brake failure. Here are the most reliable red flags:
- Squealing or squeaking: A high‑pitched, metallic squeal typically comes from a built‑in wear indicator on the brake pad that contacts the rotor when the pad material is thin. Once the pad reaches about 2 mm, the indicator rubs and creates a noisy warning.
- Grinding noise: If you hear a low, gritty grinding, the pad surface is gone and the metal backing is scraping the rotor. This can damage the rotor and cost extra.
- Pedal feel changes: A soft or spongy pedal often means air in the brake lines or low brake fluid the hydraulic medium that transfers foot pressure to the brakes. A firm, steady pedal is the norm.
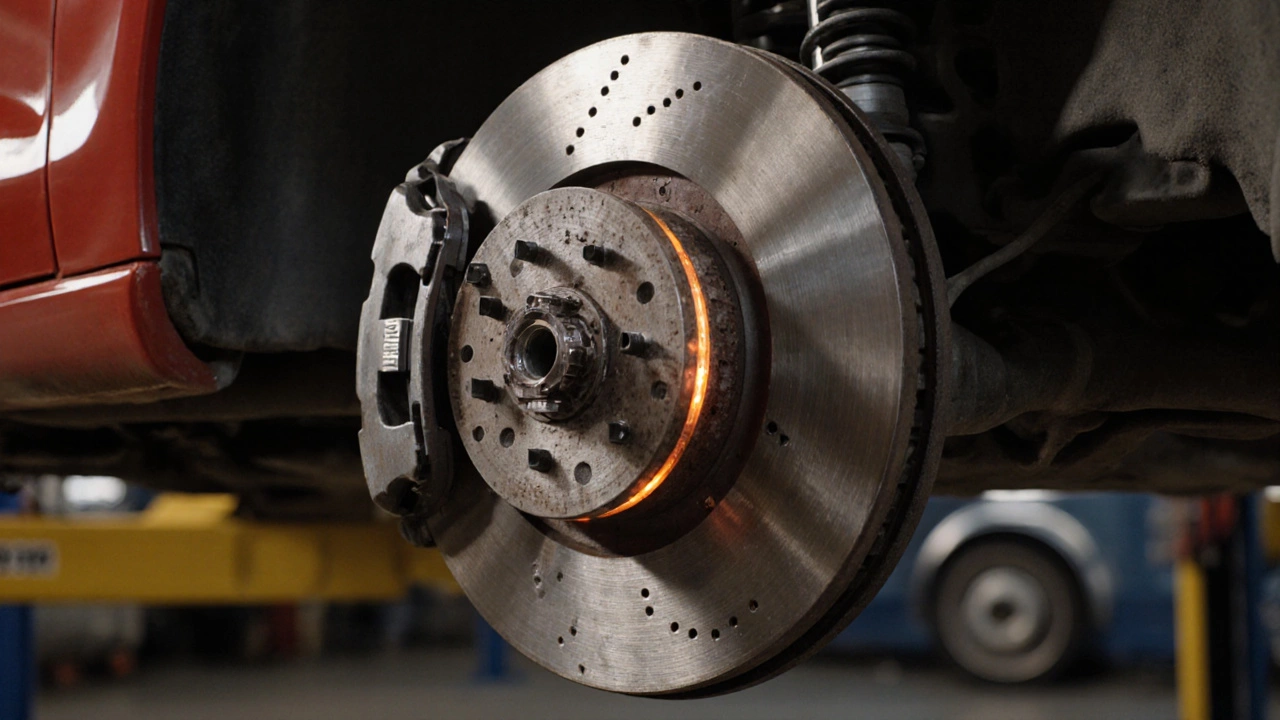
- Vibration or pulsation: If the pedal shudders during hard stops, the brake rotor a flat, metal disc that the pads clamp onto is likely warped or unevenly worn.
- Pulling to one side: Uneven pad wear or a stuck brake caliper the hydraulic clamp that pushes the pads against the rotor can cause the vehicle to drift when you brake.
- Brake warning light: Many newer cars illuminate a dashboard icon when the system detects low fluid, worn pads, or a fault in the ABS anti‑lock braking system that prevents wheel lock‑up.
2. Quick DIY Inspection of Your Brake Pads
If you want a first‑hand look before booking a shop, follow these simple steps. You only need a flashlight, a jack, and a set of lug nuts.
- Park on level ground, engage the handbrake, and place wheel chocks behind the opposite tires.
- Loosen the lug nuts on the front wheel (or rear, depending on which brakes you’re checking) just enough to turn them by hand.
- Lift the vehicle with a jack and support it on jack stands. Remove the wheel.
- Locate the brake pad visible through the caliper opening; it sits opposite the rotor. Most pads have a thin metal tab that serves as the wear indicator.
- Measure the remaining friction material with a ruler or a dedicated pad thickness gauge. If the pad thickness is under 3 mm (about 1/8 inch), plan for replacement soon.
- Check the brake rotor for deep scoring, discoloration, or a glossed surface. Lightly run your finger over the surface; a smooth feel is good, but any ridges mean the rotor may need resurfacing or replacement.
- Re‑install the wheel, lower the car, and torque the lug nuts to the manufacturer’s specification (usually around 100 Nm for passenger cars).
Even if you’re not comfortable removing the wheel, you can often peek at pad wear through the caliper opening without lifting the car-just shine the flashlight and look for the metal tab contacting the rotor.
3. Components That Also Need Attention
Worn pads are just one piece of the puzzle. The following parts can cause similar symptoms and should be checked when you suspect brake trouble.
| Component | Typical Wear Indicator | When to Replace | Cost Range (AU$) |
|---|---|---|---|
| Brake pads | High‑pitched squeal from wear tab | Thickness ≤ 3 mm | 80-200 (per axle) |
| Brake rotors | Vibration, pulsating pedal, visible scoring | Runout ≥ 1 mm or deep grooves | 150-350 (per rotor) |
| Brake caliper | Pulling to one side, uneven pad wear | Stuck piston, fluid leak, severe corrosion | 120-300 (per caliper) |
Other items to glance at:
- Brake fluid should be clear amber and topped up to the "max" mark in the reservoir. Old fluid turns dark and can cause spongy feel.
- ABS sensors and modulators that keep wheels from locking during emergency stops may trigger a warning light if a sensor fails.
- Fuel‑efficient vehicles sometimes use a brake wear indicator a thin metal strip built into the pad that squeals when the pad is thin.
4. DIY Brake Pad Replacement - What You’ll Need
If the inspection says “replace,” you can handle the job in a couple of hours with basic tools.
- Jack and jack stands (rated for your vehicle’s weight)
- Socket set with torque wrench
- Brake pad spreader or C‑clamp
- New brake pads (OEM or reputable aftermarket)
- Brake grease (high‑temperature) for caliper pins
- Safety gloves and eye protection
Steps (simplified):
- Secure the vehicle, remove the wheel as described earlier.
- Locate the caliper retaining bolts (usually two).
- Unscrew the bolts and swing the caliper away - you may need to support it with a piece of wire to avoid stressing the brake hose.
- Pull the piston back using a C‑clamp or a dedicated brake piston tool; this creates space for the new pads.
- Remove the old pads, clean any dust or debris from the caliper bracket, and apply a thin layer of brake grease to the sliding pins.
- Install the new pads, making sure the wear indicator (if present) faces the rotor.
- Re‑mount the caliper, torque the bolts to the spec (usually 30-45 Nm).
- Repeat on the opposite wheel, then pump the brake pedal a few times before moving the car. This seats the pads against the rotors.
- Replace the wheel, lower the car, and torque the lug nuts.
After a replacement, take the car for a short test drive. The pedal should feel firm, and the squeal should be gone. If you still hear noise, the rotors may need resurfacing.
5. Extending the Life of Your Braking System
Good habits can keep brakes performing longer and avoid surprise trips to the mechanic.
- Mind your driving style: Hard, frequent stops wear pads faster. Coasting and gentle braking preserve material.
- Keep rotors clean: Brake dust is abrasive. A quick spray with brake cleaner after a dusty road trip reduces grit buildup.
- Flush brake fluid every 2 years: Moisture in the fluid reduces boiling point and can cause fade.
- Inspect for corrosion: In coastal areas like Adelaide, salty air accelerates rust on caliper pins and rotor faces.
- Don’t ignore warning lights: The brake‑system light is a clue that something is off-address it promptly.
Following these tips means you’ll hear fewer squeals and enjoy smoother stops for many kilometres.
Frequently Asked Questions
How often should I check my brake pads?
A visual check every 6 months or at every oil change is ideal. If you drive in heavy traffic or mountainous terrain, inspect them quarterly.
Can I drive with a grinding noise?
Driving with metal‑on‑metal contact can damage rotors and compromise safety. Stop the car as soon as possible and have the pads and rotors inspected.
What’s the difference between ceramic and semi‑metallic pads?
Ceramic pads produce less dust and operate quieter, but they are generally softer and may wear faster on high‑performance cars. Semi‑metallic pads handle high temperatures better but can leave more dust on wheels.
Why does my brake pedal feel soft after a long hill descent?
A soft pedal after a long downhill often means the brake fluid has boiled or air entered the lines. Let the system cool, then bleed the brakes or have a professional do it.
Do brake dust and brake wear affect my car’s resale value?
Yes. Well‑maintained brakes are a key selling point. Clean rotors, fresh pads, and no warning lights can add a few hundred dollars to a resale price.
Keeping an eye on the sounds, feel, and visual clues of your braking system lets you replace parts before they become safety hazards. Use the DIY steps when you’re comfortable, and don’t hesitate to visit a qualified mechanic for deeper issues.